How to Deploy iOS app to the App Store from Scratch in Flutter using Fastlane and GitHub Action
This is a step-by-step guide taken from my live coding session on How to deploy an iOS app to the App Store in Flutter using Fastlane and GitHub Actions.
This is a step-by-step guide taken from my live coding session on “How to deploy an iOS app to the App Store in Flutter using Fastlane and GitHub Actions”.
In the video, I used my open-source app called WhatTodo as an example to showcase how we can deploy an iOS app on the App Store from scratch.
We are using Fastlane and GitHub Actions to automate this process end-to-end.
One tip I follow before setting up any CI/CD part is to make sure that, first, it works locally. i.e., I can deploy the app using the same command I am going to use on CI from my local. Because debugging locally is faster and easier than on the CI.
Hence, our first step here is to set up this locally.
1. Local Setup
Before diving into Fastlane, make sure your local environment is correctly configured.
1.1 Install Ruby and Fastlane
The macOS comes with its own Ruby version built-in. This version might be outdated and cause compatibility issues with Fastlane and GitHub actions.
The best way to handle this is to have a separate updated version of Ruby using Homebrew with below command :
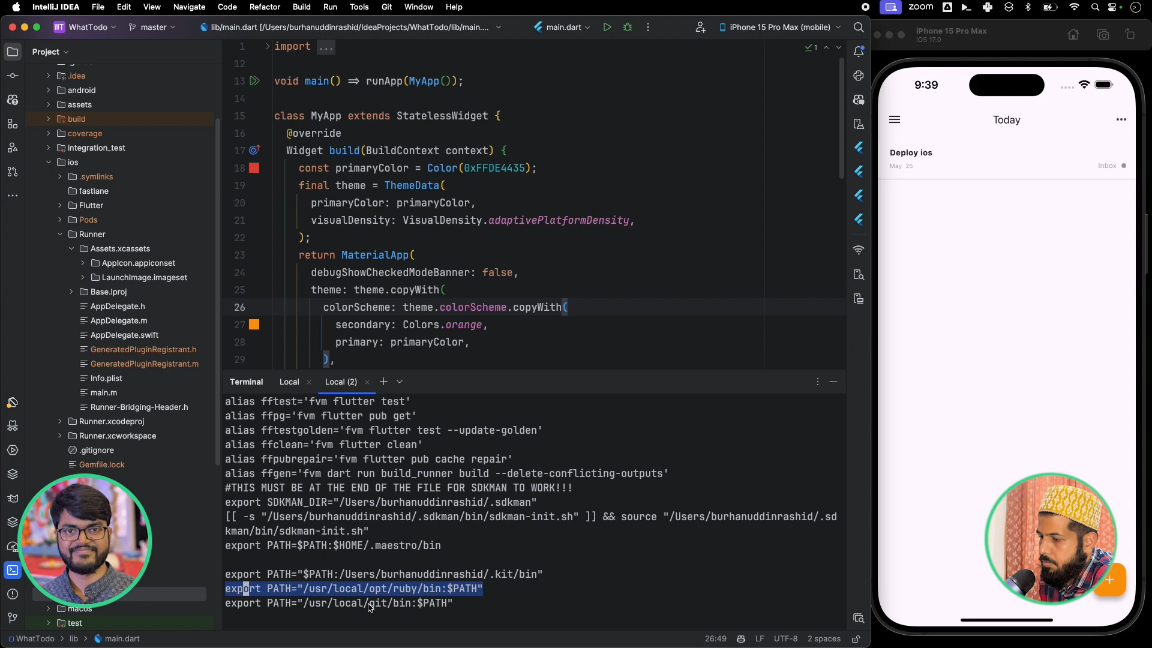
brew install rubyAnd set this homebrew Ruby version global on Mac by setting up the path in your .zshrc or .bash profile like this :
export PATH="/usr/local/opt/ruby/bin:$PATH"And then install fastlane
brew install fastlane1.2 Get Apple Developer Account
To deploy apps to the App Store, you need to have a paid Apple Developer account, which costs $99 yearly. Once enrolled, register at least one iOS device in your developer account.
2. Initializing Fastlane
Make sure that you have a unique "Bundle identifier" for your app.
In our live coding session, we encountered a conflict with our existing bundle identifier burhanrashid52.flutterapp , because someone else had already registered it. Therefore, we had to change it to a new unique identifier burhanrashid52.whattodo.
Now, let's initialize Fastlane and configure it for our app.
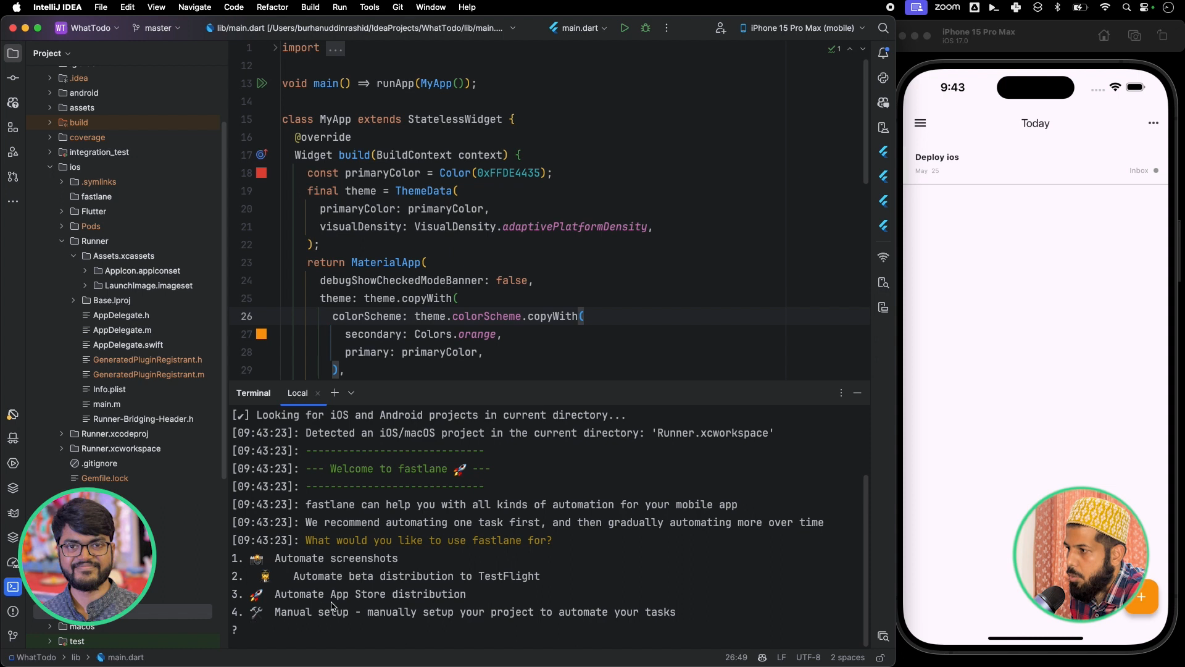
Run fastlane init in the ios directory to initialize Fastlane.
Choose option 2, Automate beta distribution to TestFlight, when prompted.
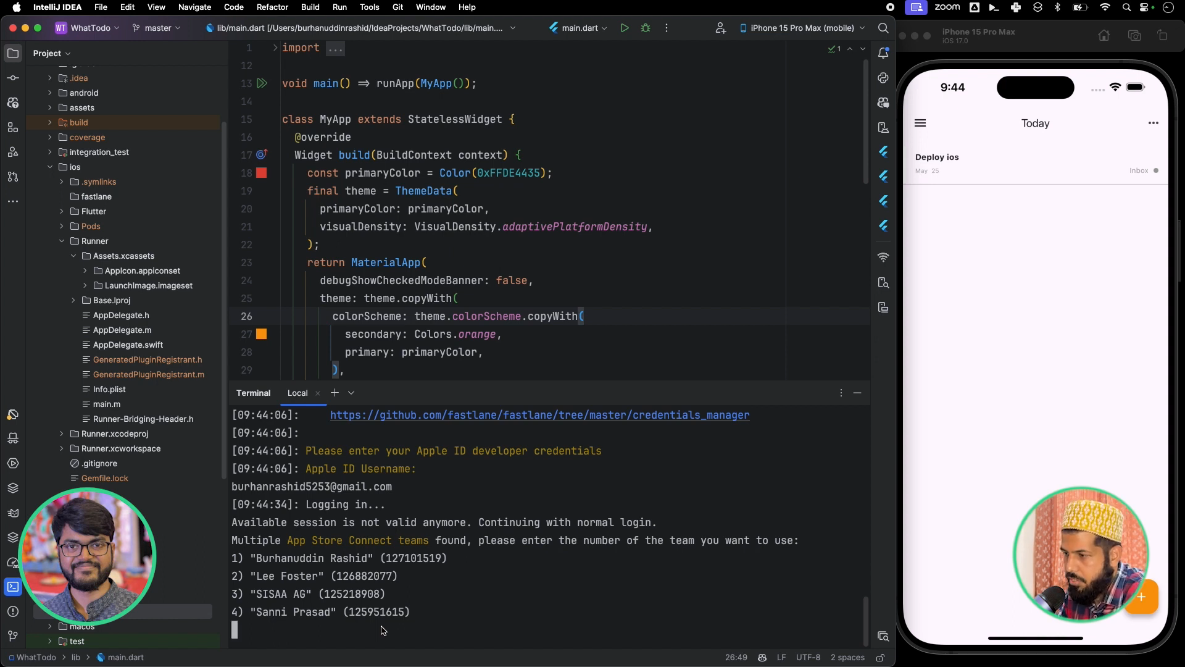
Enter your Apple Developer email and select the appropriate team when asked.
[Optional] If Fastlane encounters a conflict with an existing bundle ID than
Open Runner.xcworkspace in Xcode.
Go to Target > Runner > General and click on the arrow next to "Bundle Identifier".
Rename the bundle identifier to a unique value, such as com.yourcompany.example, and save the changes.
Goto step 1 and restart the process.
Then it will ask for creating an identifier on the store by asking, Do you want Fastlane to create the App ID for you on the Apple Developer Portal? Type y assuming you are doing this from scratch.
Type the name of your app when it asks for the App Name. This will create all the app details with the bundle identifier on Apple portal.
If your app name is a common word, then it might not work. You might need to change the name a little bit. Don’t worry, this is just an app name for the App Store. Once it is created from Fastlane, you can manually change it from the Apple Developer account.
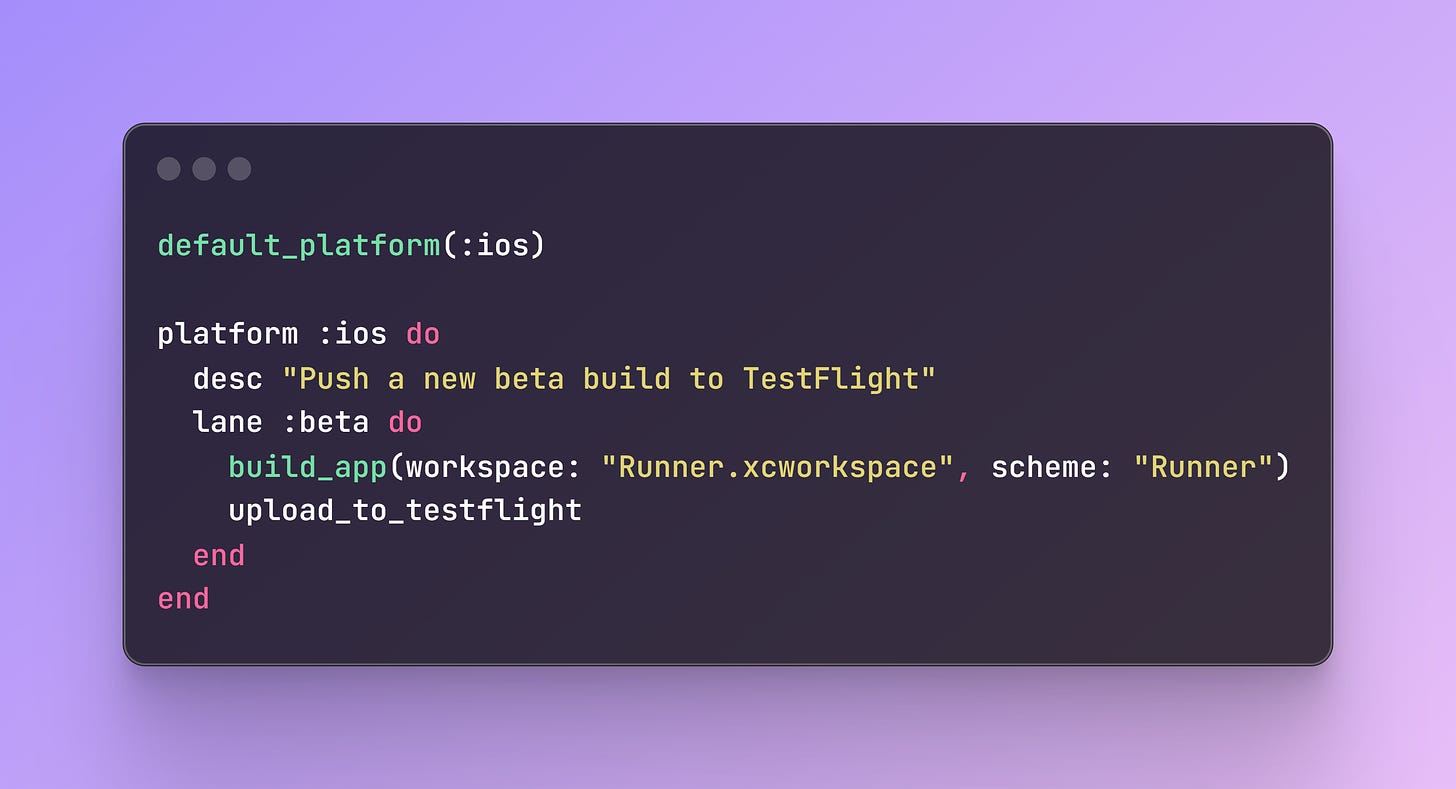
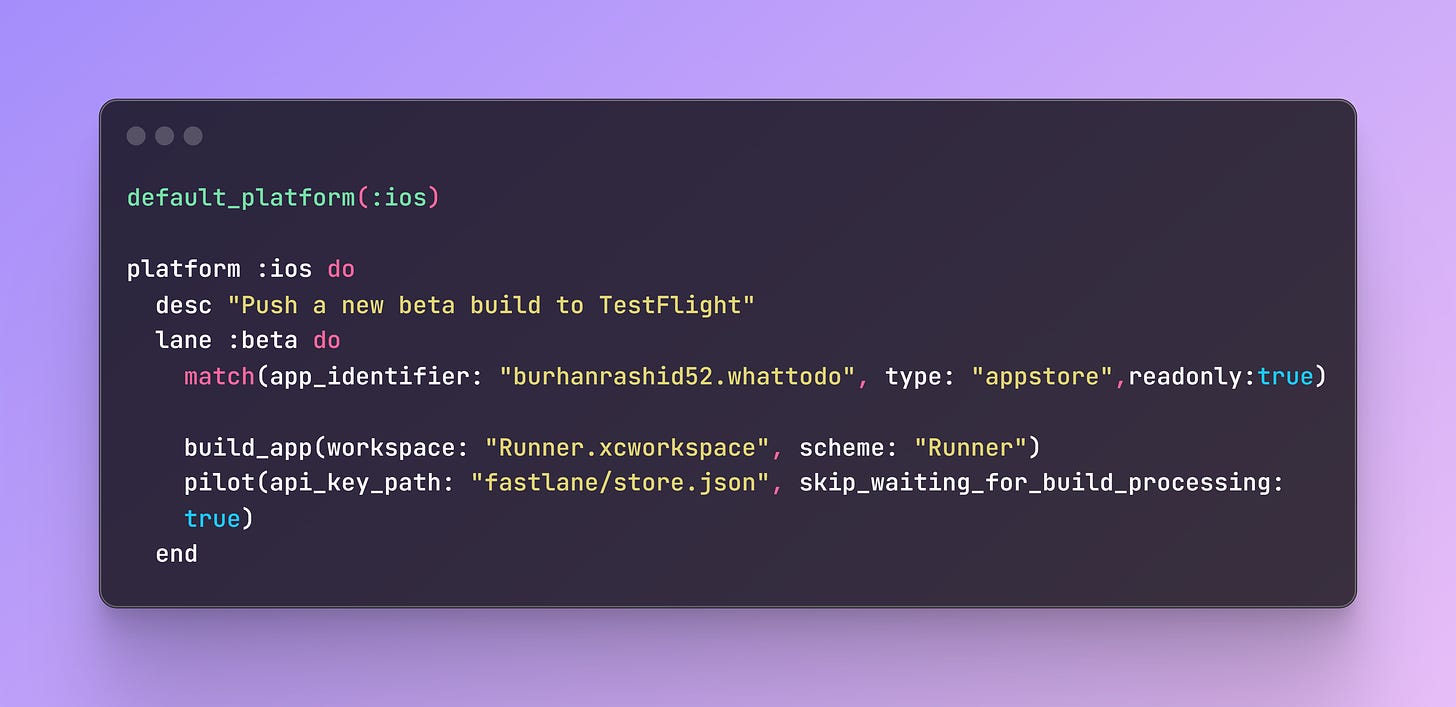
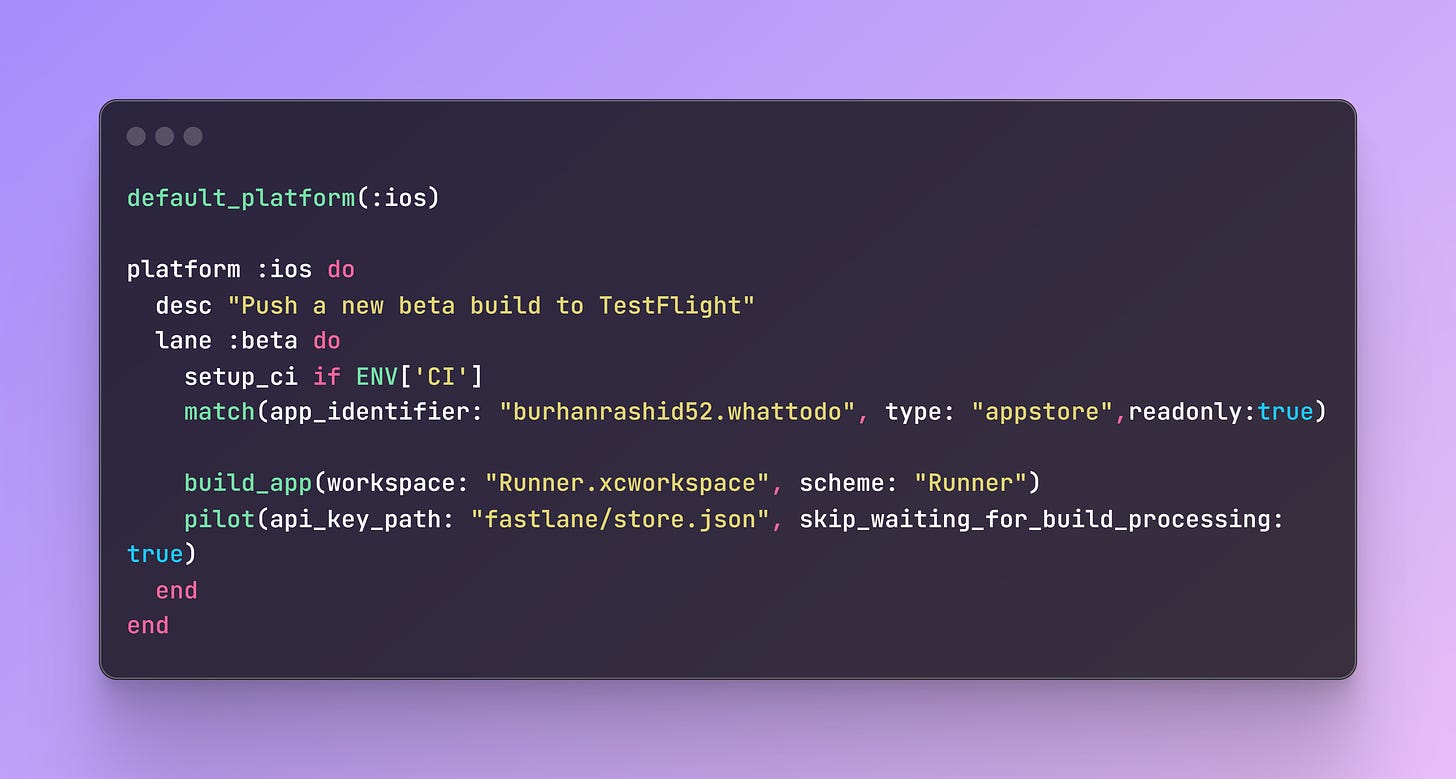
Great!! After step 6, it will create a Fasttlane file inside ios/fastlane folder with ruby function like this :
We run this function by executing the fastlane beta command inside the iOS directory. However, this will fail because we have not set up the certificates yet, which we are going to do next.
3. Creating and Managing Certificates
Apple is known for its great User Experience (UX), but its Developer Experience (DX) is really bad. The biggest headache of all is creating, signing, and managing certificates for any app on the app store.
This is where tools like fastlane really shine. It automates this big task using the match command.
3.1 Set up the Fastlane keys
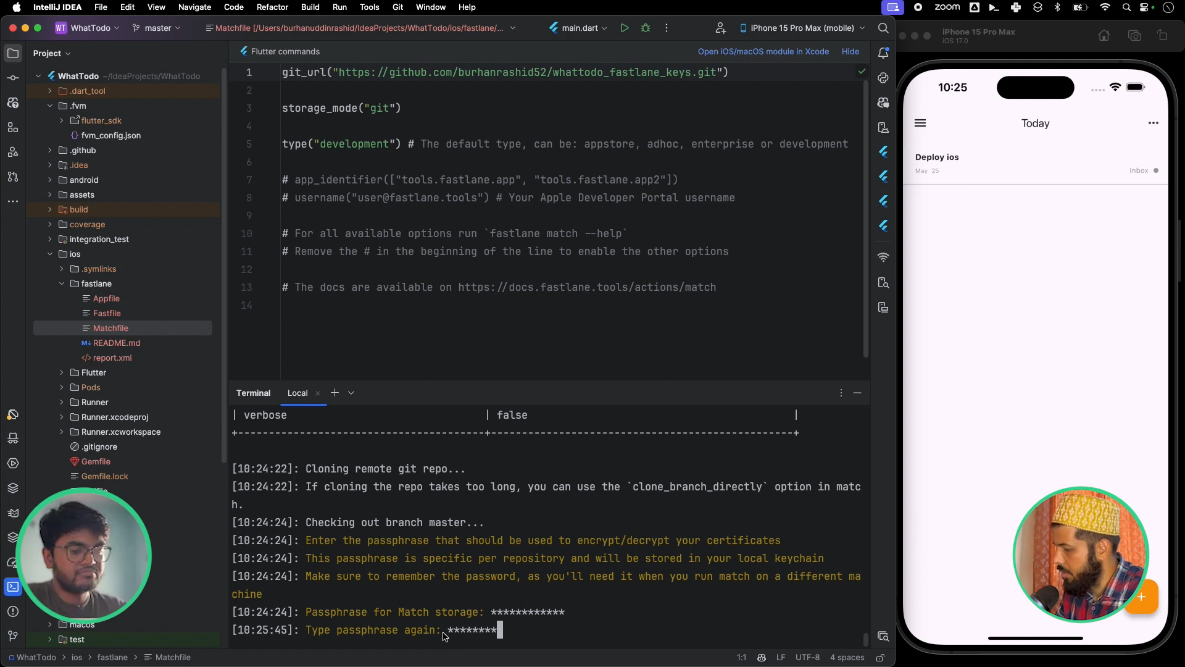
Run fastlane match init in your terminal.
Choose option 1, "Git", for storing the certificates.
On GitHub, create a new private repository specifically for storing your iOS certificates. Name it something like my_app_fastlane_keys. This is where all your certificates are safely stored and remain consistent throughout your build.
Paste the URL of your newly created private repository when prompted. Commit and push the generated Matchfile to your repository.
3.2 Generating and Matching App Store Certificates
Run fastlane match appstore to generate an App Store distribution certificate and provisioning profile.
Enter a Match storage password when prompted. This will encrypt the certificates in your repository (Save this password because we’ll need this to set up the GitHub Action). Fastlane will automatically store the generated certificates in both your local keychain and the private repository.
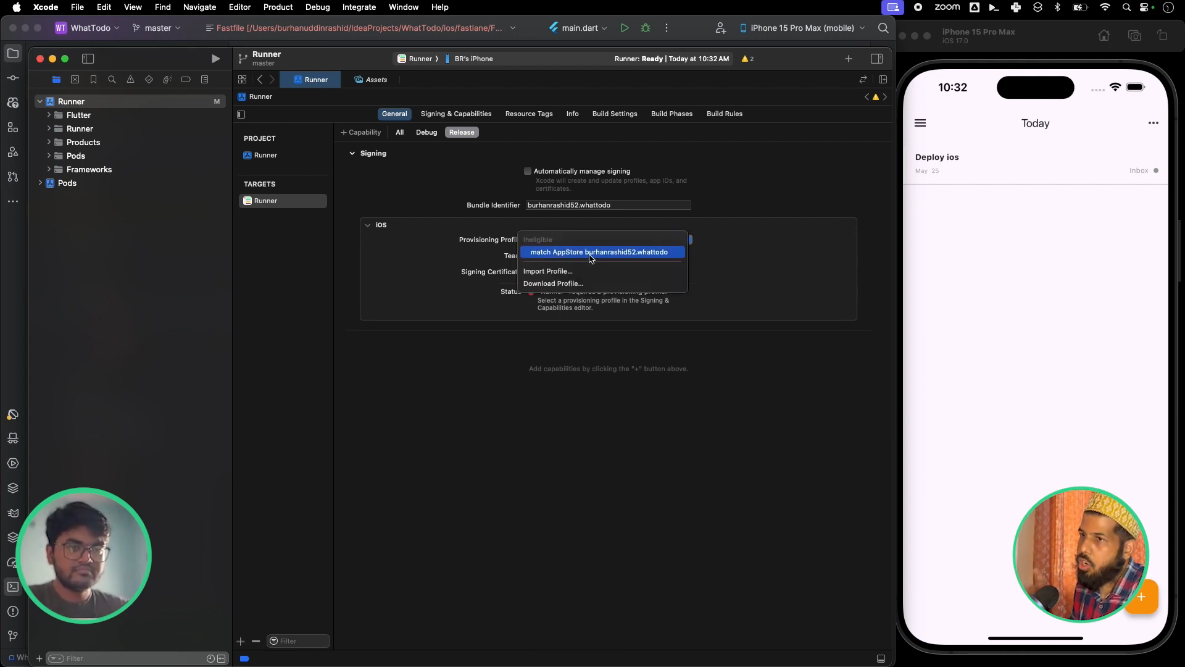
Select the Profile in Xcode:
Open Runner.xcworkspace in Xcode.
Go to Target > Runner > Signing & Capabilities.
Select "Manually manage signing" and choose the "match AppStore burhanrashid52.whattodo" profile from the dropdown.
3.3 Build IPA locally with Certificates
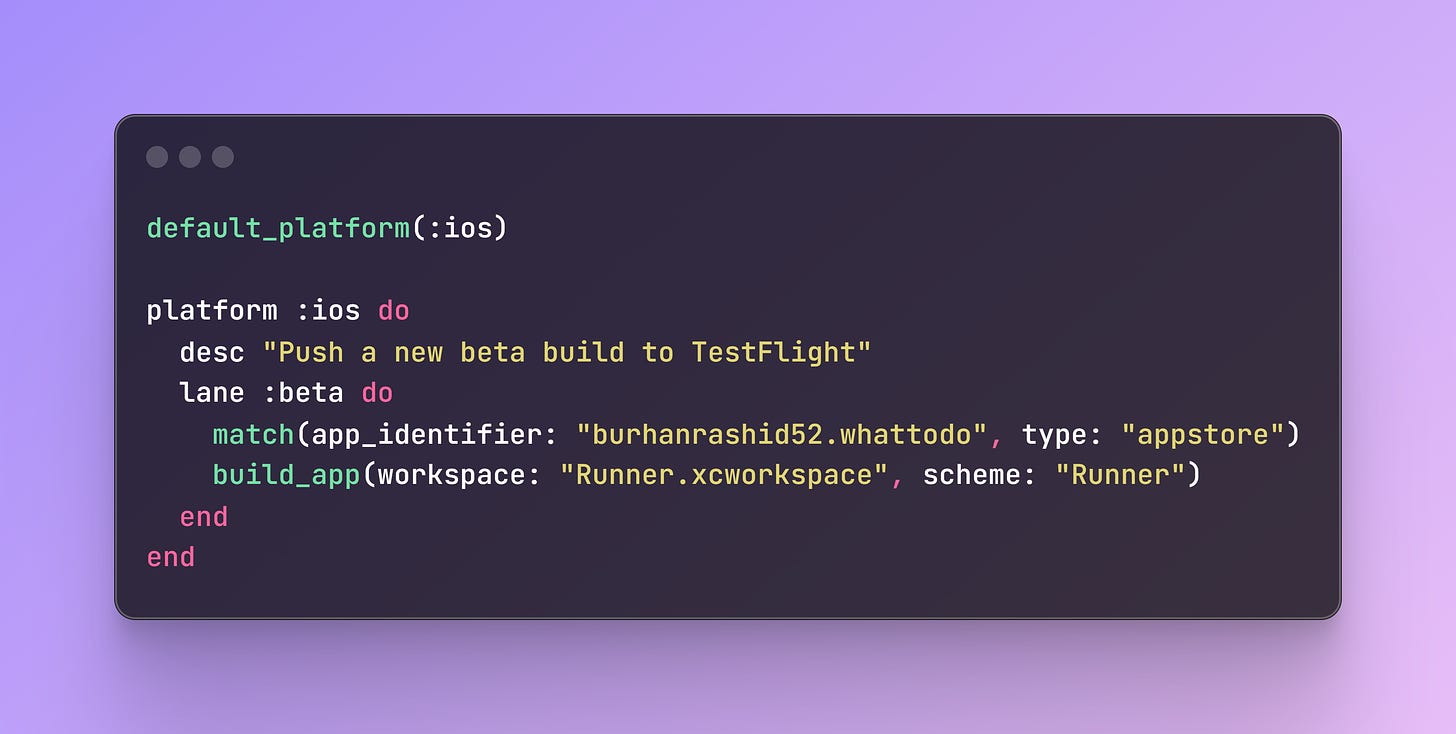
We need to test if we can build the app locally using the generated certificates in the previous step. For that, we need match command in fastlane beta function like this
We define our bundle ID and the certificate type for the IPA build in match function.
Now when we run fastlane beta it will fetch all the certificates and will create an IPA file in our iOS directory.
Great!! We are now halfway there. Now since we can build an app locally, now we have to deploy it to the App Store locally.
4. Deploy to the Appstore from local.
To deploy to TestFlight, first, we need an access key to allow us to upload the IPA file to the App Store.
In fastlane we can do this using pilot command with and store.json file like this
Follow the below step to create the store.json file
Create a new file named store.json in your ios/fastlane directory.
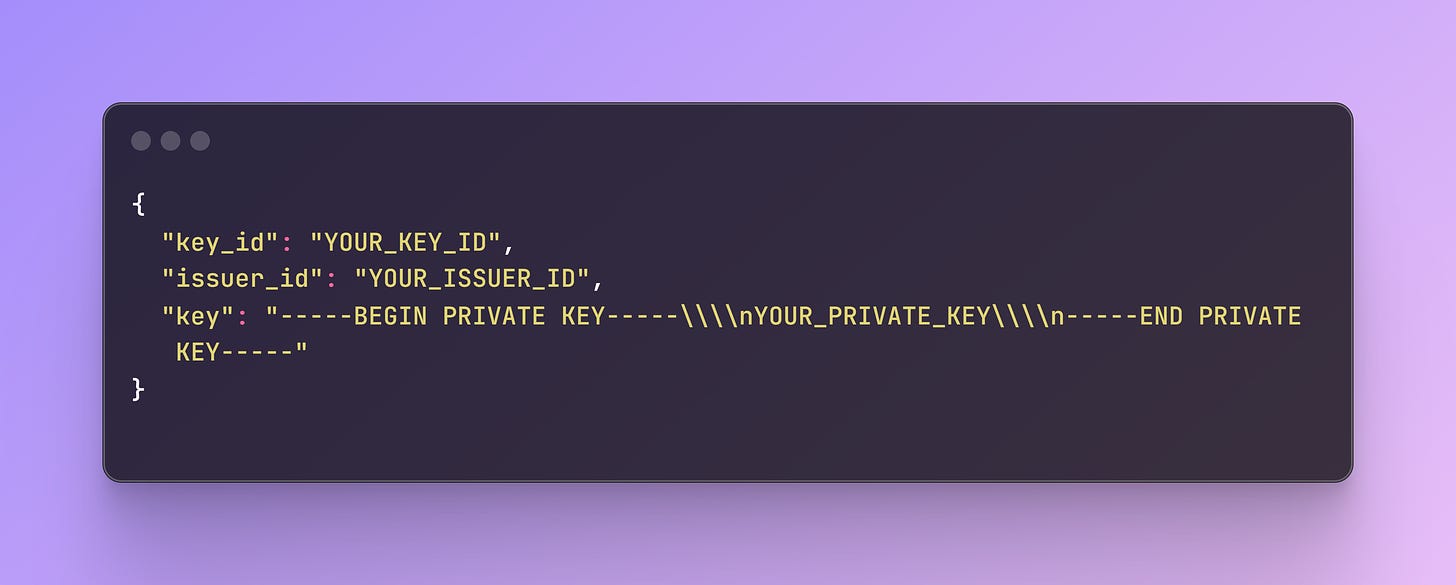
Add the following content to the file, replacing placeholders with your actual values:
Obtain Placeholder values key from App Store Connect:
Open App Store Connect and navigate to Users and Access > Integrations.
Click on "App Store Connect API". Request access by checking the box and clicking "Submit".
Generate a new API key with "Admin" access. Download the .p8 file, which contains your API key.
Copy the "Key ID" and "Issuer ID" from the App Store Connect interface and paste them into your store.json file.
Open the downloaded .p8 file, copy the entire content of the key, and paste it into the "key" field of your store.json file.
Add store.json to your .gitignore file to prevent it from being committed to your repository.
To test it out, we'll run the fastlane beta command, which will first create and match certificates, then build our app using those certificates, and then deploy it to the App Store.
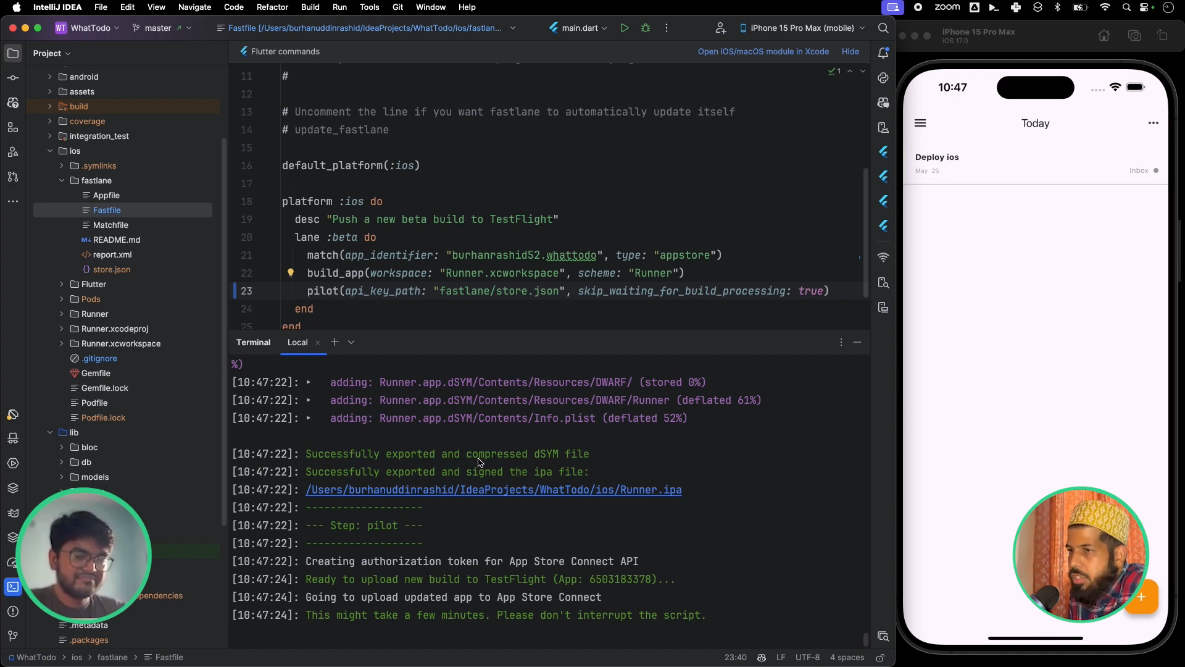
Once the command runs, we will now see Ready to upload new build to TestFlight log in the CLI.
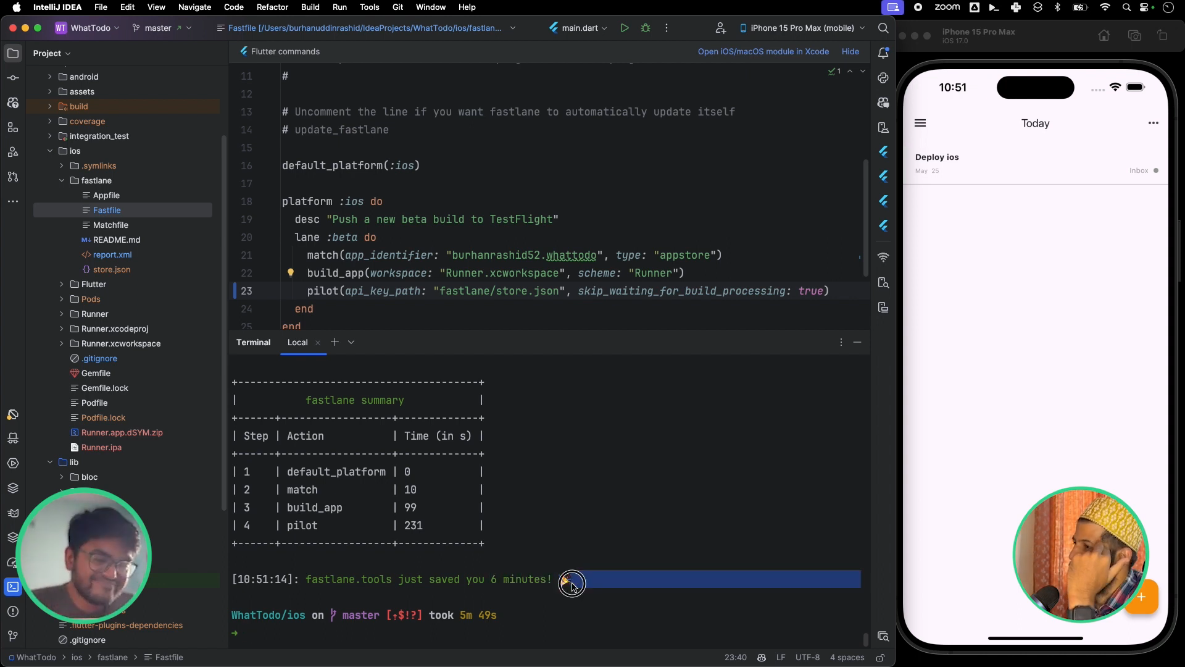
It will take around 10–12 minutes, and once it's finished, it will show something like this:
5. Setting Up GitHub Actions for CI
Once the setup works locally, then setting up the CI is pretty straightforward. We have all the credentials ready.
Now we'll automate the deployment process using GitHub Actions.
In your project's root directory, create a new folder named .github/workflows. Inside the workflows folder, create a new file named deploy.yml.
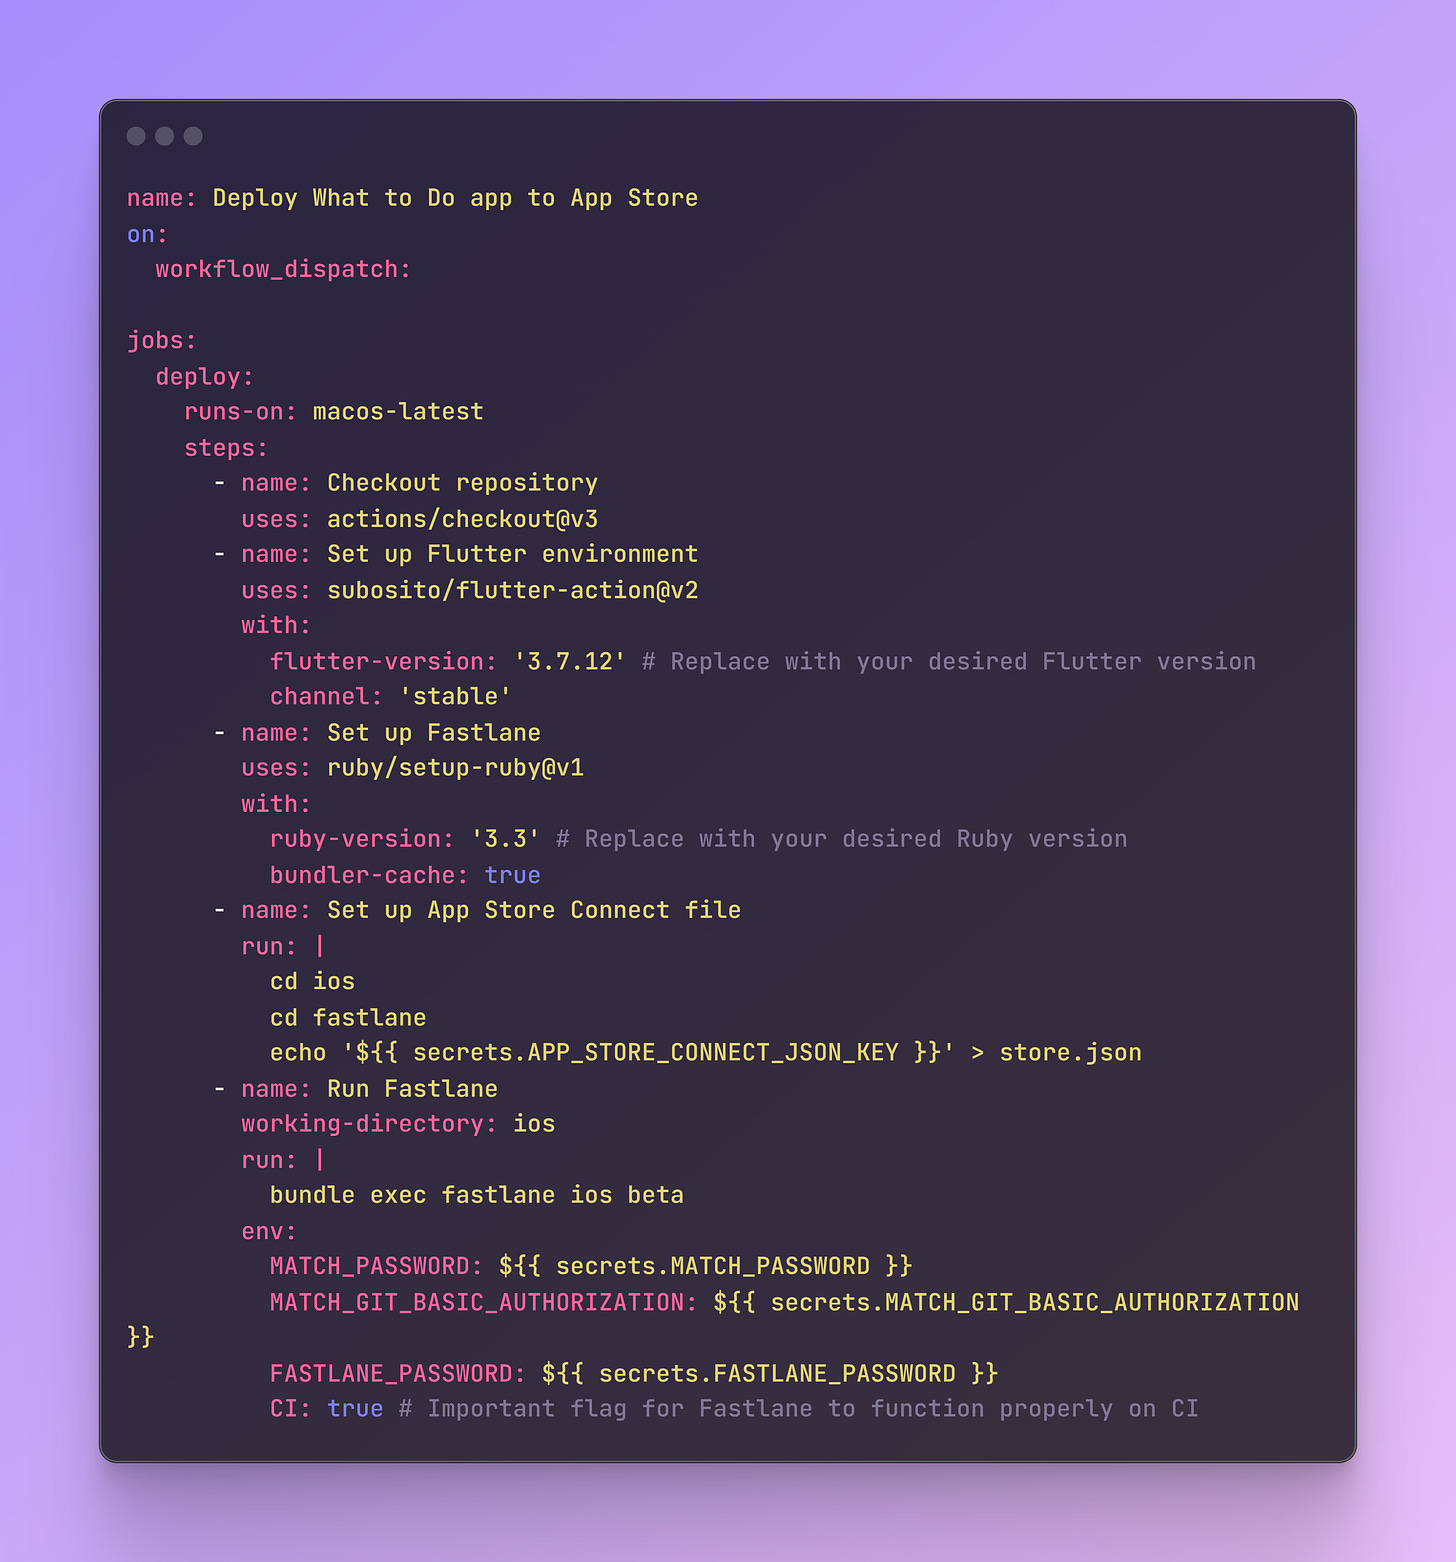
Add the following code to your deploy.yml file, replacing placeholders with your actual values. Make sure we are running this on macos-latest.
Configure GitHub Secrets:
In your GitHub repository settings, go to Secrets > Actions.
MATCH_PASSWORD: Paste the password you set during fastlane match appstore.
APP_STORE_CONNECT_JSON_KEY: Paste the entire content of your store.json file.
MATCH_GIT_BASIC_AUTHORIZATION: This is a GitHub PAT for my_app_fastlane_keys repository. Because it's private, we need a token to access that repo on CI. So Get personal access token from GitHub and encrypt it using base64
To generate this base64 value, run the following command in your terminal, replacing placeholders with your GitHub username and the personal access token you created:
echo -n 'YOUR_GITHUB_USERNAME:YOUR_PERSONAL_ACCESS_TOKEN' | base64
Paste the base64 outpost as your MATCH_GIT_BASIC_AUTHORIZATION secret.
FASTLANE_PASSWORD: Paste your Apple ID password.
Add the setup_ci flag in beta function so that the fastlane functions properly on CI.
That’s it. Once the setup is done, all you need to do is trigger this workflow, either manually or using tags.
For the final touch, to avoid conflicts with existing build versions on TestFlight, you need to increment the build number each time you deploy. You can set this up using environment variables FLUTTER_BUILD_NAME and FLUTTER_BUILD_NUMBER using GitHub Actions with your logic. I am leaving this exercise up to you.
Congratulations!
Now, you have deployed an iOS app to the App Store using Fastlane and GitHub actions effortlessly.
This setup might seem daunting at first, because it took me 1 week to learn and set up this process correctly. So don’t give up, keep coding happily and deploying successfully.
Also, If you are a Flutter developer who wants to advance your Flutter skills, then I am currently running live classes called effectiveflutterdev.com. So if you are interested, then apply now.
Also, If you enjoyed this post, then would you be able to do me a quick favor and share my latest blog post with your friends and colleagues? I'd really appreciate it and I think it could be valuable to them.


